Your New Farm
The farm you spent your childhood has become a bit run down since your grandfather passed away, but it is still a good starting point for your new farm lifestyle. The farm itself is a defined size and contains a farm house, a livestock barn, a poultry barn, and a vast field just waiting for you to till and plant crops!
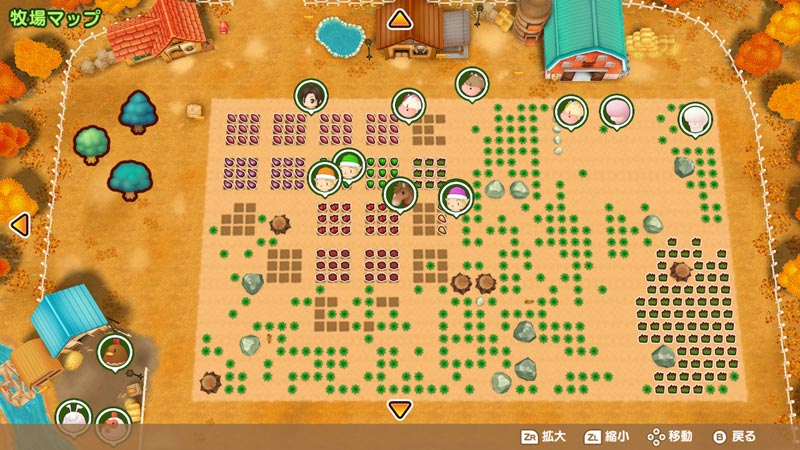
The minus (-) controller button will open a map of your farm, showing the layout of your planted crops, the location of your animals and helper sprites, and the types of fruit/honey trees that Gotts has added.

The majority of your farm space is the crop field, a large dirt plot of 25 squares by 43 squares set aside for growing vegetables, flowers, and fodder grass. The field will be cluttered with boulders, weeds, and stumps. These obstacles will need to be cleared using your Hammer and Axe; some boulders and stumps require a higher-level tool to be used on them. Saibara the smithy will upgrade your tool strength if you bring him the appropriate ore, money, and a tool with enough experience to upgrade.
The Fish Pond on the farm is where you'll draw water for your watering can. You can also store fish that you've caught in the pond.
Crop Preparation
Seeds can be planted after enough space has been cleared of obstacles. Seeds can only be planted in the season they're assigned to: spring, summer, or fall. Seeds cannot be pre-planted before their specified growing season (e.g., you can't plant summer seeds on Spring 30), and all seasonal seeds/plants will wilt on the first day of the new season. There are no crops that will grow during winter season.
Jeff's general store and Huang's shop have seeds for sale. One bag will cover a 3x3 square of space on your field. The shop seeds do not have Star Rank. Jeff's seed inventory is specific to the current season you are in, but Huang will have his seeds available all year long. Extra bags of seeds can be stored in your farm tool box.

Once you have your seeds, the next step is to prepare the soil. Use the Hoe to dig the soil into a 3x3 square. When digging you might find coins (1 coin = 1 G), a Power Berry (one time only), and moles. These critters do not harm your crops and only appear for a brief moment after being uncovered by your digging. If you are quick, switch to your Hammer and hit the mole in the head before it disappears back underground. The number of moles you've whacked appears in your farm house bookshelf. Each time you hit 100 moles you'll earn 1 Farm Degree point (max 100).
Next, plant the seeds by equipping the bag and then pressing the Y Button while standing on the tilled soil. In the this edition of Friends of Mineral Town the crops can be walked on, so feel free to plant crops directly next to each other.
The next step is to water the seeds. Use the Watering Can at the watering hole by the horse barn, then sprinkle the seeds with water. Crops should be watered once per day; watering crops a second time will NOT make the plants grow faster in this version of Story of Seasons. Crops do not need to be watered on rainy days.
After several days the crops will be ready to harvest! Some crops can only be harvested one time and some can be harvested multiple times.
Crop Star Rank
The crops you can grow have an associated Star Rank; the more stars the crop has, the more gold you can receive when you ship the crop. Flowers do NOT have Star Rank.
The crop field determines the available ranks your crops can have. The rank of the harvested crop is randomly determined when you harvest from the plant based on your current field level. Starting in year 2, Gotts will offer field upgrades at his carpentry shop. Each year you can increase the quality of your farm soil by paying Gotts a fee. He offers five field level upgrades:
- Upgrade to Field Level 2 = Year 2 or later, 20,000 G
- Upgrade to Field Level 3 = Year 3 or later, 50,000 G
- Upgrade to Field Level 4 = Year 4 or later, 100,000 G
- upgrade to Field Level 5 = Year 5 or later, 300,000 G
The higher the field level, the greater the chance that higher level rank crops can be harvested. The field left by your grandpa (level 1) will mainly produce 1-star crops, but there's a chance that you'll also harvest 2-star crops. Upgrading your field to level 2 will still produce 1-star crops and 2-star crops, and now has a chance of producing 3-star crops.
At level 4 your field can produce 5-star crops. Upgrading the field one last time to level 5 increase the chances of 5-star crops.
Fodder Grass
There is a small patch of wild fodder grass in the southeast corner of the farm when you move in. The grass can be harvested using the Sickle to produce Fodder to be fed to your livestock but not to your chicken and poultry; these animals eat chicken feed, which you can make by putting harvested corn into the combination waterwheel/feed storage next to the poultry barn.
You can buy more Grass Seedlings from Jeff's general store for 500 G each, but they only plant 1 square of grass in your field. The reason for this is because the grass creeps and spreads on its own. Every morning there is a 25% chance that the grass will spread to the next square of empty soil in your field. Since you don't need to water grass for it to grow, you can basically ignore the grass and soon enough you'll have a large patch of growing grass.
Placing lumber in your field will contain creepy grass to the area you've outlined with lumber. Grass will only spread to an empty square of field space, so a square occupied by a fence will stop the grass from growing in that direction. You can also use small rocks to block the grass.
Grass grows during Spring, Summer, and Fall. Once Winter arrives, the grass goes dormant and cannot be harvested. You may let your livestock outside during the Winter, but there won't be anything for them to eat. When Spring comes back around there is a 70% chance that the dormant grass will return; so while you may want to harvest all of it before Winter 1, it is a good idea to leave some Fodder Grass in the pasture area of your field for springtime.
When harvesting Fodder Grass you may come across wild colored grass too. The wild grasses that pop up at Fodder harvest are based on the current season you are in:
- Spring = Blue Grass, Orange Grass, Yellow Grass
- Summer = Blue Grass, Green Grass, Purple Grass, Red Grass
- Fall = Green Grass, Indigo Grass, Red Grass
Carry-Over Crops

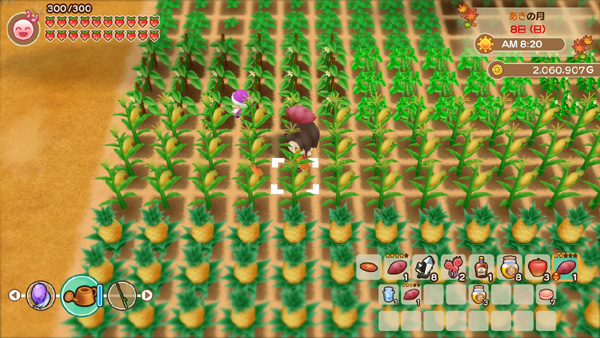
You can exploit the game to force crops to carry over to the next season. This allows you to harvest the single-harvest crops before they wilt. For multi-harvest crops, this trick carries them over to produce all new season long. Pineapples in Autumn? Yep, it's possible if you're crafty!
- On the 30th of the current season, don't cut back the field crops. Leave them in the field as you would any other day of the season.
- Once you are ready to sleep for the day, use your tools to deplete all your stamina (the power berry icons) and increase your fatigue (the face icon). Stamina is tracked by stamina points (STA) and count down to zero as you use your tools, while fatigue starts at zero and increases to 100 as your fatigue points (FAT) tally up. Details about STA/FAT can be found on the Health page. For this trick, you want to have 0 stamina and enough fatigue that the face marker is blue colored.
- The blue face icon appears once the fatigue value is around 80 FAT. The next step is to use your tools a few more times until you believe you have between 95 and 99 total FAT. Using a tool when you have 0 stamina will earn +1 FAT when the in-game time is before midnight or +2 FAT when it is after midnight. Count your tool swings and try to get within the proper range. Keep in mind that you'll naturally increase fatigue at specific times of the night as a penalty for being awake so late: +3 at midnight, +4 at 2:00 am, and +4 at 4:00 am.
- The last step is to stay awake until the game forces you to sleep at 5:59 am. If you own the mysterious books in your farmhouse book shelf, rewarded to you by the Harvest Goddess based on the number of offerings you have tossed into her pond, read the books until the in-game clock reaches the proper time on the first day of the new season. For farmers who don't own the books yet, stand outside until the clock naturally becomes 5:59 am.
What happens is the farmer protagonist will recover -5 FAT naturally when the game forces the farmer to go to bed at 5:59 am, but then also earns +10 FAT for not voluntarily going to bed. You want to ensure the combined fatigue earned is enough to push your health into the dangerous 100-FAT level to force a fainting spell. For example, if you had 93 FAT at 6am, you would first end up with 88 FAT (93 - 5 = 88) and then finally 98 FAT (88 + 10 = 98), which isn't enough to pass out. So that's why you want to have between 95 and 99 FAT.
When the farmer awakes at 6:00 am on the 1st, having 100 points of fatigue will trigger an exhaustion event that lands the farmer in the Mineral Town clinic for the whole day. You'll then regain access to your character on the 2nd with full stamina and a fresh level of fatigue. Since the clinic visit outside the farm triggers before the crops wilt on the first day of the new season, the prior season's crops will remain in the field.
Carrying over crops from Winter to Spring may affect the My New Life, Farm Life Forever, and Agriculture I Am Thy King in-game achievements. Using the exploit will result in you waking up on Spring 2, and the achievements are earned when you wake up in the morning on Spring 1.